Friday, March 23, 2012

Three designs - steel stud, wood 2x4, 1/2 inch conduit

I've put together three different frames - one using steel studs, another using 2x4s, and one using 1/2 inch conduit. I've sold the two larger frames on craigslist, so I wanted to get some photos online before they're gone and I don't have them to refer to.

On all three, I found that adding 1/2 conduit spacers and a tension band around the bottom helped to make the whole thing much sturdier. I used the area and radius formulas for dodecagon (12 sided polygon) from wikipedia to compute the lengths for the pieces. Wherever possible, I set up lengths that would allow me to make one cut to get two pieces - i.e. vertical side piece + horizontal piece = 10" for the steel stud frame.

All three frames are strong and stable. I can hang from the center on all of them - approx 200 lbs.
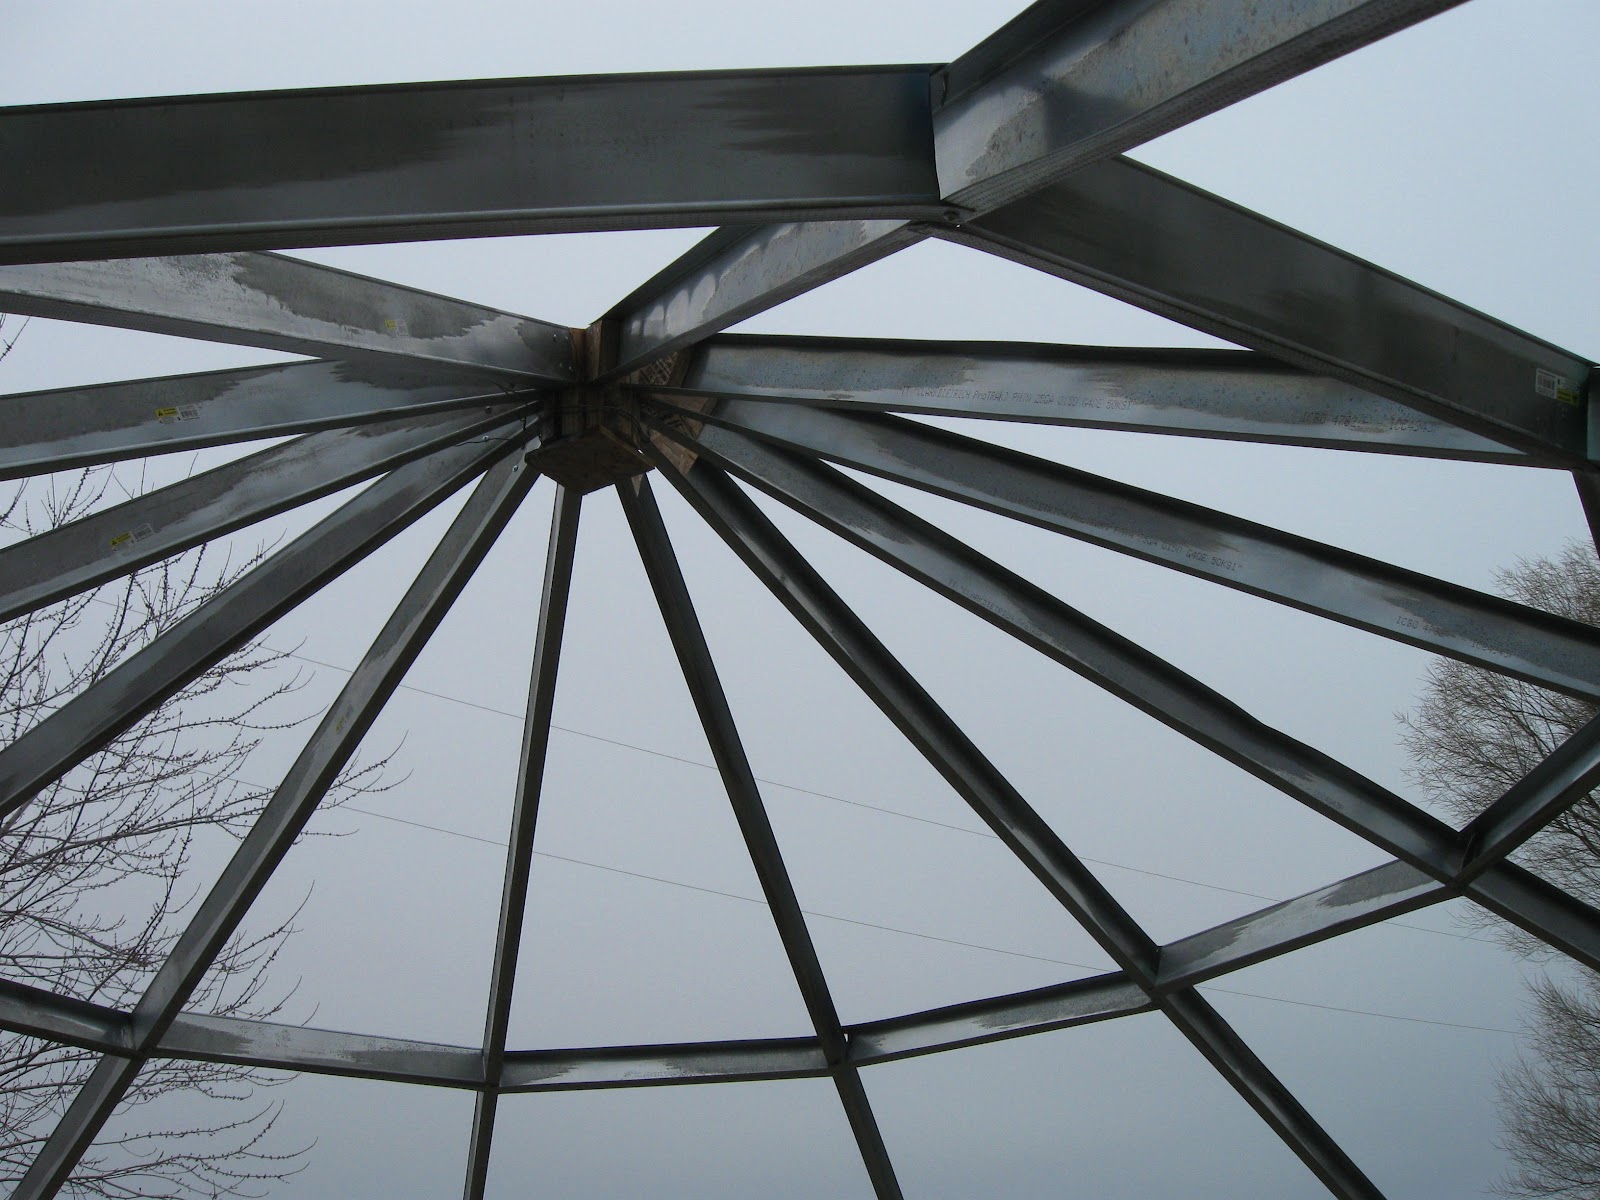

 Steel stud frame


10 foot steel studs were purchased at Lowe's. The joints were cut out from two sheets of OSB glued together for thickness. The roof piece is 10 feet long. Horizontal piece is 55.5 inches and the vertical piece is 64.5 inches. Center height is 10 ft 6 in. Area is 225 square feet and the perimeter is 56 ft.
Labels for different parts


2x4 frame


The joints were made from steel studs and riveted together. The roof piece is 8 feet long. Horizontal piece is 43.5 inches and the vertical piece is 5 ft. Center height is 9 ft. Area is 155 square feet and the perimeter is 45 ft. The foil faced insulation is Prodex, purchased from http://www.insulation4less.com/.


1/2 inch conduit


This is the design I'm focusing on at the moment. So, only two photos for now, but more to come. I'm focusing on this one because it's light, easy enough to put together for a one or two day campout, and should be quite inexpensive. The joints are made from 3/4 inch conduit welded together by a friend. The 1/2 inch conduit just slides into place. The roof pieces are 6 ft 10 in long. Horizontal pieces are 38 inches and the vertical pieces are 5 ft. Center height is 8.5 ft. Area is 107 square feet and the perimeter is 38 ft. I'm working on the cover now. When it's finished, I'll post the details and photos here.

conduit frame at left is quite a bit smaller than the steel stud frame


If you'd like more specifics on any of these, leave a comment. I'm planning to do detailed plans for the conduit version soon.

Friday, March 9, 2012

OSB Hexayurt, a.k.a. the milk barn

If you're interested in a detailed description of our OSB hexayurt, read on.

This yurt started out three years ago with a standard hexayurt design, using OSB sheathing and 2x4 and 2x6 lumber for a frame. The doorway was too low to be convenient, so we rebuilt it with one modified section to allow for a full sized door. Shortly after that modification, I discovered the H13 hexayurt design and wished I'd done that instead.

Version 2 of our hexayurt sat for several months partially disassembled until a friend convinced us to get a milk cow. We needed some kind of shelter for milking in and decided to move the yurt and modify it one more time. We moved it to it's present location and added an H13 modification to the opposite end so that we could build a door for the cow to come in and out.

Front door

roofing
H13 with large door
home made door - open 
Roof joists

Front door

Ceiling meets wall; this was built to split into two sections. The double 2x4 and bolts  are only used on one seam.

Another interior shot. Part of stanchion and milking equipment at left.

Foundation
Materials included 2x4's 7/16 OSB sheathing, 2x6's around base, metal trim where roof meets the wall section. It's put together with sheet rock screws and Gorilla glue. The outside of the OSB was painted with two coats of white exterior paint in the first version of the yurt. Version 2 added the rolled roofing. For the current configuration, we coated the entire exterior with Duralite roof coating. The door and window came from our local Habitat for Humanity recycled building supplies store.

Here are links to roof coating (we used about 2/3 of a 5 gal bucket) and rolled roofing (2 rolls) at Lowe's.

For a foundation, we just used concrete blocks, bricks, and some old landscape timbers. The foundation wasn't very well done; luckily we live in a dry climate. On the H13 end, we dug a 2 foot post hole and cemented in a 4x4 post.

What I'll probably do differently if I built one again:
H13 design for door and more headroom.
I'll probably skip the rolled roofing and just use the roof coating.
Do a more traditional 2x4 frame with 4x4's around the base and studs every 2 feet and use 3/8 sheathing.
Better foundation.

All in all, it's holding up well. No changes since we finished version 3 last summer. Despite several hard windstorms, we've had no issues with the roof or with leaking.

Saturday, March 3, 2012

Getting started

I work full-time as a computer programmer, but since I stayed in a forest service yurt for a winter camp out  several years ago, I've been interested in yurts. (My family might say obsessed.)
Initially, I built a "hexayurt" out of 7/16 OSB sheathing. I ended up taking it apart and rebuilding it at least three times. It's finally evolved into a very functional milking shed.

I also put together a "stretch hexayurt" from 1" foam panels and most recently, a more portable yurt with a wooden frame and a flexible insulation covering.

I've decided to start a side-business to build and sell yurts locally as well as put together kits and plans for sale via the Internet. I'm working on several prototypes now. More details to follow...